Saturday 10 February 2018

Making a Draw String Gift Bag

At this time of year after I've put away the Christmas decorations I  like to have a good tidy up and my husband feels the urge to decorate. I often find projects that I planned ages ago but haven't completed. This happened the other day when I came across a chess set that I had put away planning to make a bag to store it in. So I dug out some oddments of cotton from my bits bag and made this draw string bag.


The dimensions of my bag are 17cm x17cm. I cut 2 pieces from the lining which were 19cm square and set these aside. Then I cut 2 rectangles from the blue fabric 19cm x 32cm to allow for the gathers and the neck of the bag. I stitched each blue piece to one patterned piece, pressed the seams open and placed these right sides together.


I stitched around the edges taking a 1cm seam allowance, leaving a gap of about 4cm along the bottom of the lining to turn the bag out to the right side. Some of you might recognise the lining material from my sleeveless shell top that I wore on holiday in Paris.


Next, I trimmed the corners, pressed the seams open and turned the whole bag right sides out through the gap I had left in lower seam.


As you can just see in this picture, I closed up the hole in the lining with a short section of top stitching. I didn't re-thread my machine with white thread to close the hole because this stitching will be in the bottom of the bag and I reasoned that as it wouldn't be seen the blue cotton didn't matter and it wasn't worth the fiddle. 

I pushed the lining down inside the bag taking care to push the corners into place securely. Then I pressed my bag again. As you can see I had a double layer of blue fabric at the top to form the neck of the bag. I used a white tacking stitch to mark the join between the blue fabric and the lining because I planned to stitch a double row of stitching around the bag to form a casing for the draw strings and needed to stitch this from the outside.


When I turned the bag right side out I could see the row of tacking stitches marking the line for my first row of machine stitching. 


I have a sleeve arm on my sewing machine which is very useful for stitching around circular seams such as sleeves, cuffs and trouser hems and it was ideal for stitching the top of this bag.  I ran two rows of straight stitches around the top of the bag just less than 1cm apart using the presser foot as my guide. Then I unpicked the side seam between these rows of stitches and threaded through two lengths of string, knotting these at each side of the bag. 


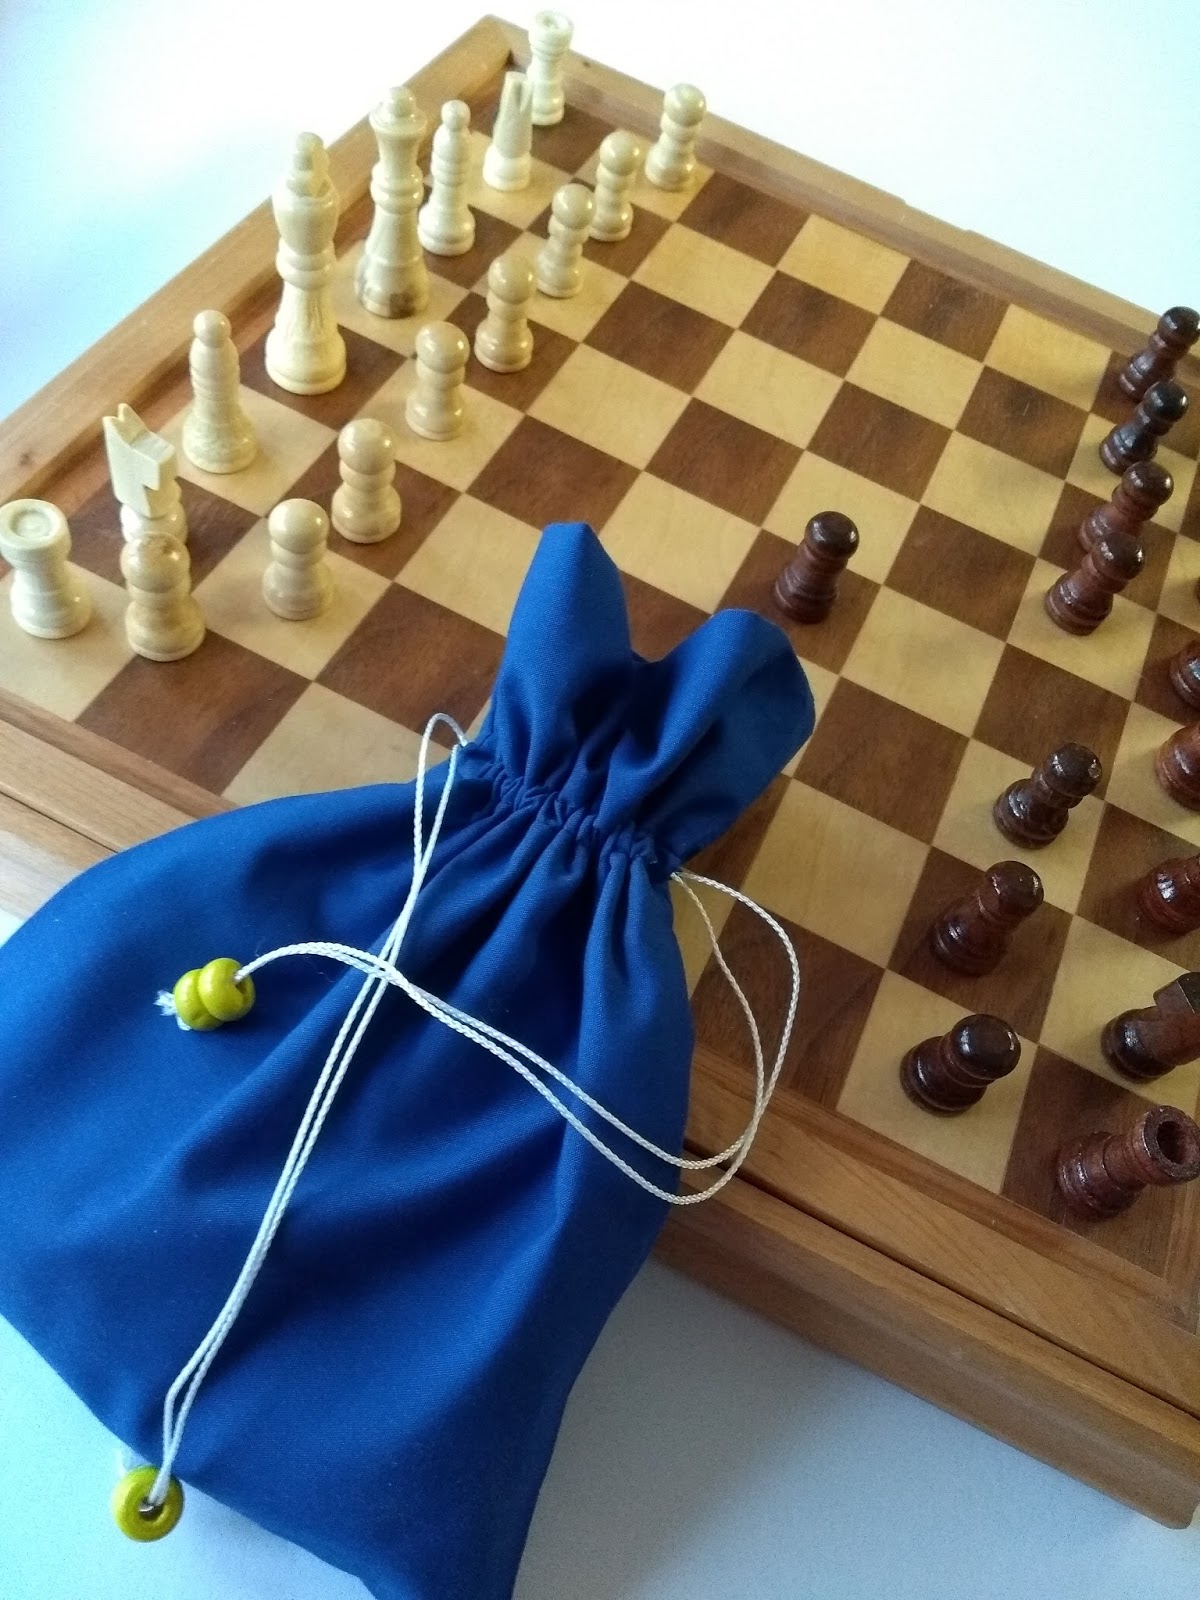
Last of all I threaded two wooden beads onto the draw strings. I have seen lots of draw string bags that only have one cord around the top but I think it is definitely worth while using two draw strings. The bag will close much more securely and doesn't slip open on its own if you used two strings. 


Monday 5 February 2018

My Second Version of the Silk Woven Tee


This top is my second version of the Silk Woven Tee from the Great British Swing Bee book, Fashion with Fabric. I bought this fabric thinking it was a woven lace but when I came to cut it out I realised that it was actually knitted and had a slight stretch. This was really good news because I knew from making it before here that if I made this top in a slightly stretchy fabric I wouldn't need to put in the side zip. 

When I saw this fabric it was love at first sight... I knew as soon as I saw it that I wanted to make a simple, short-sleeved top.


The top layer of the fabric is  cream, knitted lace with a design of flowers and dots. The wrong side is a knitted mesh. These two layers are loosely bound together and easily pulled apart during construction.


Cutting out was easy. There was no need to match this all over floral pattern and the fabric didn't fray too badly when it was cut. I stitched all of the seams with a small zigzag stitch to allow some stretch in the seams and to prevent them from popping later. I used the 0.5 width setting on my machine for this.


The pattern advised me to press the seams open and neaten the seam allowances separately. This didn't work at all well for my soft, slightly stretchy fabric. The seem allowances were too soft to lie flat. When I tried to neaten the edges they stretched and the layers of fabric came apart. Instead I put the seam allowances together and neatened them with my overlock stitch. Then I pressed the seam allowances towards the back of the garment throughout. The overlocked seams gave my T-shirt some much needed structure.


I used a light weight iron-on interfacing to give the neck facing more body, which I also neatened with the overlock stitch. I under-stitched the facing close to the seam to keep it in place. I think this has been especially necessary for this fabric which doesn't hold a press at all well. 


Last of all I took up a 2cm hem on the sleeves and a 3cm hem around the bottom which I stitched by machine for quickness. It really was a lovely quick project.

I took these photos in a sunny spot at home and I have to say that I am very pleased with the way this top turned out, so I have included a review of the pattern below


Pattern Review:

Pattern description
A simple T-Shirt with a classic set in sleeve and neckline finished with a facing.

Pattern Sizing
Women's size 8 - 20. I made size 12.

Did it look like the photograph in the book once I had made it?
Yes it did.

Were the instructions easy to follow?
The Fashion to Fabric book has really good instructions for each pattern and also includes all the basic sewing techniques in the first half of the book. There are lots of diagrams and all of the sewing terms are explained. This would be a very good place for an absolute beginner to start.

Fabric used
This pattern is especially designed for woven fabrics, but I have made it twice now in a stretch material. My first in scuba and this version in a double knitted lace. 

Any alterations I made to the pattern.
I omitted the zip from both versions of this T-shirt that I have made in stretch fabric. It pulls on over my head without any difficulty at all. 
For this version I opted to neaten the seam allowances together with the overlock stitch from my sewing machine. I do not own an overlocker. The pattern advised you to press the seam open but instructions are included for zigzagging a closed seam on page 29 of the book in the instructions for neatening raw edges. 

Would I make this again and recommend it?
Yes I would make it again. I have already made two. This is a quick, easy make. Any challenge to your sewing skills will come from your fabric choice and not from the pattern, which is very easy. Inserting a side zip is not easy so if I do make another T-shirt in a woven fabric it will take me longer and be a bit more of a challenge. 


Conclusion
I think this is an ideal wardrobe basic and a good project for anyone who is just starting to sew their own clothes.